Published September 18, 2026
6 Steps Crews Can Use for Evidence Grade Job Photo Documentation

Job photo documentation means capturing photos directly into a project-linked system, so every image carries verifiable time, location, and job context. The right approach is simple: your crew captures into the job record on-site, not into a personal camera roll. Do that consistently, and you build evidence that holds up in disputes, tracks real progress, and speeds up every inspection and closeout that follows.
TL;DR:
Consistent photo capture directly into a job system with timestamp, GPS, and proper tagging is essential to create verifiable evidence and avoid unorganized storage.
Photos should follow a fixed sequence: open the correct job record, capture a reference wide shot, detail, label equipment, and confirm embedded metadata before moving on.
Proper organization ties images to specific locations, trades, milestones, and equipment IDs, with both metadata and visible stamps supporting retrieval and validation.
Field teams must strictly adhere to rules such as capturing photos before leaving site, assigning roles, and enforcing permission controls to maintain record integrity.
Selecting tools that support automatic tagging, offline capture, and direct job linking ensures the integrity and usability of photographic documentation throughout projects.
Table of Contents
-
The Biggest Photo Documentation Mistakes We See in the Field
-
Put Your Photo Checklist Into a System That Actually Uses It
What Job Photo Documentation Really Means
Raw photo storage and job photo documentation are not the same thing. A folder full of unlabeled site photos tells you almost nothing six months later. True documentation ties every image to a job, a date, a location, and a purpose, so anyone on your team (or a client’s attorney) can reconstruct exactly what happened and when.
This matters most in a handful of situations:
-
Inspections — proving code compliance or work quality at a specific stage.
-
Disputes — showing what existed before a claim of damage or defective work.
-
Progress tracking — giving owners and PMs a visual timeline without a site visit.
-
Closeout and handover — building the as-built record a facilities team will actually use.
-
Marketing — turning finished work into before-and-after proof for future bids.
At minimum, every usable photo needs to answer four questions: who took it, when, where, and what it shows. Miss any one of those, and the image is decoration, not evidence.
How Should Crews Capture Job Site Photos?
Photographic evidence for work only holds up if it is captured the same way every time. That consistency is what separates a defensible record from a pile of snapshots. Build this into your crew’s routine with a fixed sequence at every stop.
-
Open the job record first. Pull up the correct job or work order before shooting anything, so photos attach automatically instead of landing in a generic camera roll.
-
Get a wide reference shot. Capture the whole area or fixture so viewers understand context before you zoom in.
-
Follow with a detail shot. Close in on the specific issue, install, or defect the reference shot introduced.
-
Photograph labels and equipment plates. Serial numbers, model tags, and panel labels save you a callback later.
-
Confirm the timestamp and GPS pin are visible or embedded. A photo without location data is much weaker evidence.
-
Tag it immediately. Add trade, milestone, and room or unit ID before you move to the next task, not at the end of the day.
Repeatable framing matters as much as the checklist. If you shoot a water heater from the same angle at rough-in and again at final, the before-and-after comparison writes itself. Random angles from different crew members make progress tracking nearly impossible to piece together later.
Most modern capture happens through a phone camera, and that is fine, provided the app preserves EXIF metadata rather than stripping it during upload, since many messaging apps and generic camera rolls do exactly that. For large-scale roofing, land clearing, or multi-building projects, a drone pass or a 360 walkthrough adds value the ground camera cannot, but treat those as a supplement to daily capture, not a replacement for it.
Pro Tip: Turn on your device’s built in geotagging before the first job of the day, then check one photo per site to confirm GPS data actually landed. A dead location service is the single most common reason “documented” jobs turn out to have no location proof at all.
How Do You Organize Job Site Photos So They’re Findable?
Unindexed photos are functionally lost, even if you have thousands of them sitting in storage. The fix is tying every image to place and structure, not just a date stamp.
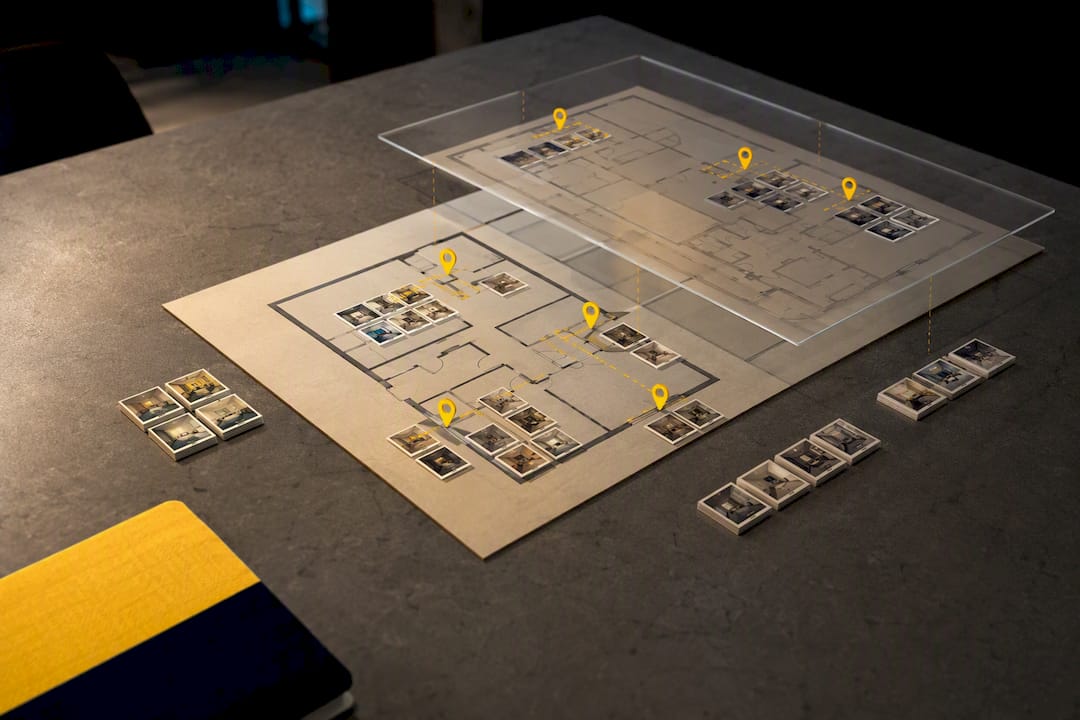
Pin photos to the plan or drawing they relate to whenever the project has one. A punch list photo pinned to the exact spot on a floor plan is worth more than ten photos with a vague “kitchen area” caption. On smaller service jobs without formal drawings, a simple room or unit ID does the same job.
Structure your tags the same way across every project:
-
Date and job ID
-
Trade (plumbing, electrical, HVAC, etc.)
-
Milestone (rough-in, final, punch, warranty visit)
-
Room, unit, or equipment ID
Visible stamps on the image itself back up the embedded metadata; use both, not one or the other. The UFGS photographic documentation specification calls for EXIF version 2.3 or higher plus geotagging on every photo, and indexing by time, location, and orientation for the final turnover package. That standard was written for federal construction, but the logic applies to any job where a client or inspector might ask “prove it” months later.
When drawings get revised mid-project, migrate your pin index at the same time, not after the fact, or you will end up with photos pointing to a floor plan that no longer matches reality. Build albums around milestones rather than dumping everything into one long roll. For closeout, the final record should hand off cleanly by location and trade so the next person who opens it does not have to guess.
What Photo Documentation Rules Should Field Teams Follow?
A capture checklist only works if your team actually follows it under deadline pressure. That takes a few non-negotiable rules, not just good intentions.
-
Capture to the system before leaving site. Photos taken and left in a personal camera roll are functionally unrecoverable for the business. Make this the rule with zero exceptions.
-
Assign roles and permissions. Not everyone needs upload and delete access; keep an audit trail of who added or removed a photo and when.
-
Run spot checks weekly. Someone should confirm mandatory fields (job, date, tag) are actually filled in, not just assumed.
-
Turn photos into work items. A crack photo that never becomes a punch item or RFI is just a picture. Route flagged issues into action immediately.
-
Set a retention policy before you need it. Decide how long photos live in active storage versus archive, and what the final client deliverable includes.
Preventing after-the-fact edits matters as much as capturing the image. Once a photo enters the project record, lock its metadata and timestamp against alteration, since a dispute-grade record that can be quietly edited is worth very little in an actual claim.
Pro Tip: Assign one person per crew as the “photo QA lead” for the week. Rotating this responsibility keeps everyone accountable without dumping the whole job on a single office admin who wasn’t even on-site.
Which Tools Actually Fit Your Job Site Workflow?
Worksite photography tools generally fall into four categories, and most teams end up mixing two of them rather than picking just one.
-
Mobile capture apps — built for quick, in-field shooting with basic tagging.
-
Integrated field service management (FSM) platforms — combine photo capture with scheduling, job records, and permissions in one system.
-
Reality-capture and 360 systems — drones and panoramic cameras for large sites or milestone documentation.
-
Professional photography services — hired for marketing-grade or contractually required final images.
Whatever category you choose, check it against the same feature list: does it stamp timestamp and GPS automatically, preserve EXIF data on sync instead of stripping it, upload directly to the correct job, support pinning to a drawing or BIM model, work offline in areas with no signal, and enforce permission levels? A tool that fails on offline capture is a real problem on rural sites or in basements with no signal.
Review sites can help you shortlist candidates, but treat feature claims there as a starting point, not proof. Confirm platform support directly through the app’s official store listing before you commit a whole crew to one app, since iOS and Android feature parity is not guaranteed. For most trade businesses, daily capture through a crew app paired with a periodic professional shoot for major milestones covers both the evidence need and the marketing need without overloading anyone’s phone storage.
How ServlyPro Puts This Workflow Into Practice
An integrated FSM platform closes the biggest gap in the checklist above: getting photos out of personal phones and into the job record automatically. ServlyPro’s photo and document upload features attach images directly to the job they belong to, so timestamp and job linking happen at capture instead of during some end-of-week cleanup.
Mandatory fields, permission tiers, and dashboard visibility let a manager spot-check jobs from the office instead of chasing crews for updates. Pair that with a visual job board and you can see at a glance which jobs are missing required photos before a closeout package goes out the door. When you evaluate any FSM against this guide, run it through the same checklist: automatic job linking, permission control, and no dead ends where a photo gets stranded outside the project record.
The Biggest Photo Documentation Mistakes We See in the Field
The most common failure is not bad photos. It is good photos stuck in a personal camera roll for three days before anyone uploads them. Fix that first: capture straight to the job, tag before leaving the room, and treat inconsistent framing as a training issue, not a personality quirk. Speed and documentation quality are not actually in conflict once capture is built into the workflow instead of bolted on at the end.
— ServlyPro
Put Your Photo Checklist Into a System That Actually Uses It
A checklist only works if the tool you’re using enforces it instead of leaving compliance up to memory. ServlyPro is built around exactly the workflow this guide describes: photos attach to the job at capture, permissions control who can upload or delete, and dashboards flag jobs missing required documentation before they reach closeout.
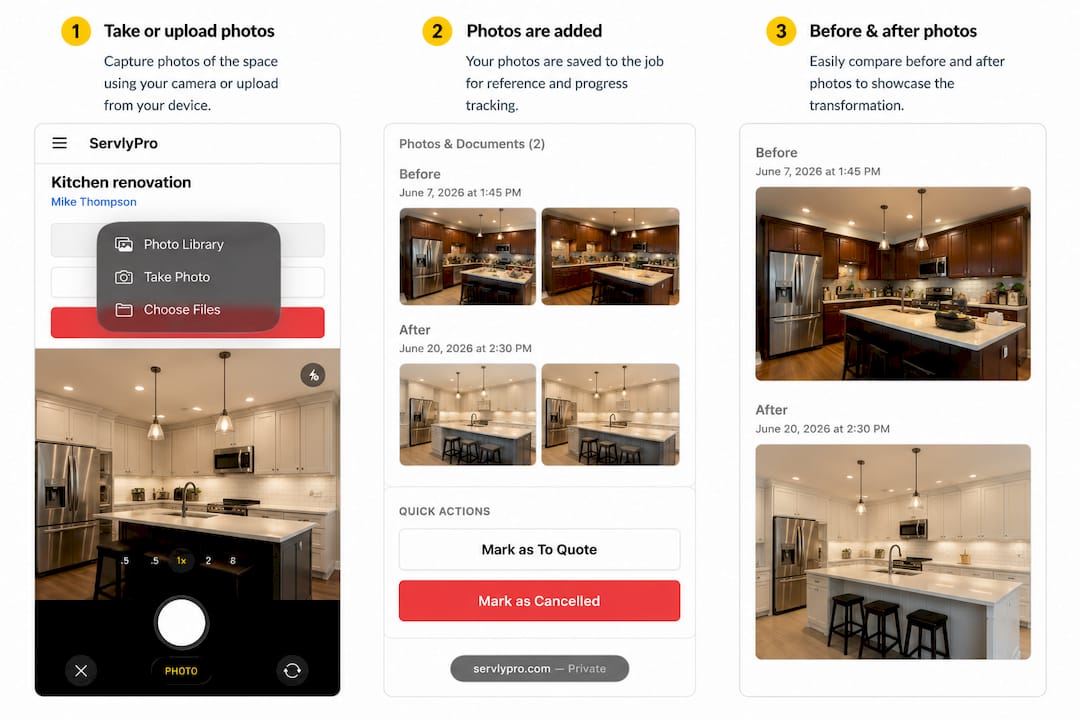
Start with the features that matter most from this checklist. Try photo and document uploads tied to each job, then layer in job scheduling so photo checkpoints line up with your actual site visits. ServlyPro’s plans start at a low monthly price for the Starter tier, with higher tiers for Pro and Team options, all available on Getservlypro. Start a trial and run your next job through the full capture-to-closeout workflow before you decide.
Where to Verify the Standards Behind This Guide
For federal-grade specification language on EXIF, resolution, and indexing, see the UFGS photographic documentation standard. For workplace safety and incident-photo handling, consult OSHA directly.
Sources
FAQ
How do you do photo documentation on a job site?
Capture photos directly into a project-linked system with a visible timestamp, GPS tag, and job ID attached at the moment you shoot. Follow a fixed sequence, wide reference shot, then detail shot, then label close-up, and tag it before you leave the location.
Is it appropriate for employers to use employee photos internally?
Photos crews take as part of documented job duties, showing work product rather than personal images of employees, are standard practice and generally appropriate for internal records like progress tracking and quality control. Keep the policy focused on job sites and equipment, and set clear rules if a photo happens to include a person, so privacy expectations stay separate from work documentation.
What is the best app for managing construction photo documentation?
The right choice depends on whether you need a lightweight capture app, a full FSM platform, or reality-capture tools for large sites. Look for automatic timestamp and GPS stamping, EXIF preservation on sync, and direct job linking; a platform like ServlyPro covers capture, job linking, and permissions in one system for trade businesses.
What counts as a professional photo for a job record?
A professional-grade job photo is well-lit, in focus, shows the work clearly at a consistent angle, and carries verifiable metadata, timestamp, GPS, and job reference, rather than just a clear image. The UFGS specification sets a formal benchmark for final-record images, including minimum resolution and indexing requirements, that’s worth matching even on non-federal jobs.